Master Your Squat: Technique-Focused Routine for Depth & Strength
Mastering your squat involves a dedicated focus on precise mechanics, consistent practice, and strategic programming, moving beyond simply lifting heavy to cultivate lasting strength, depth, and reduce injury risk through a technique-focused routine.
The squat is often hailed as the “king of all exercises,” a fundamental movement pattern essential for athletic performance, functional strength, and overall well-being. However, merely going through the motions isn’t enough; true progress, increased strength, and injury prevention hinge on mastering the underlying mechanics. This guide will help you **Improve Your Squat: The Technique-Focused Routine for Strength and Depth**, transforming your lifts from rudimentary movements into powerful, efficient expressions of strength.
Understanding the squat goes beyond just bending your knees. It’s a complex, full-body movement demanding coordination, mobility, stability, and conscious execution. This article delves into the nuances of proper squat technique, offering actionable insights and a structured routine designed to address common weaknesses and elevate your performance.
The Foundational Principles of Squat Technique
Before any weight is added to the bar, or even before you attempt an air squat, it’s crucial to grasp the fundamental principles that govern a correct and safe squat. These aren’t mere suggestions; they are the non-negotiable pillars upon which a strong and effective squat is built.
Every rep, whether unweighted or heavily loaded, should reinforce these principles. Deviations can not only limit your potential but significantly increase the risk of injury. It’s a continuous learning process, but a solid understanding of these basics provides the roadmap for improvement.
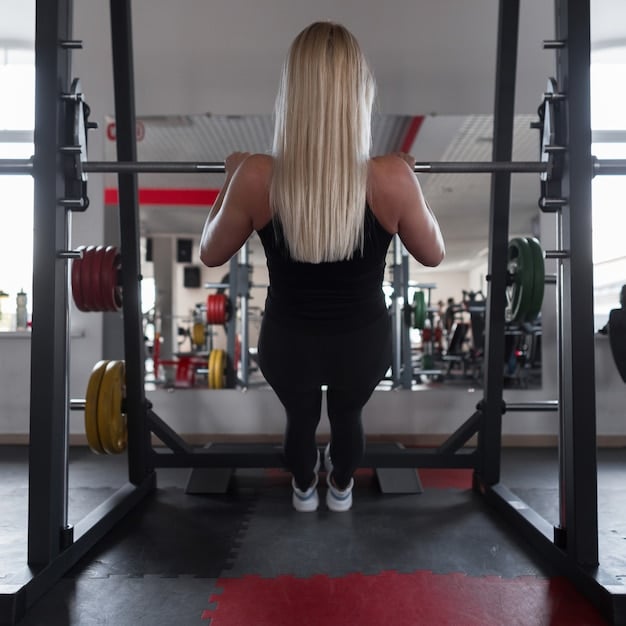
Foot Placement and Stance
Your foundation for the squat begins with proper foot placement. While there’s no universally “perfect” stance due to individual anatomical differences, some general guidelines apply to most lifters.
- Width: Aim for a stance that is approximately shoulder-width apart. Some individuals may prefer slightly wider or narrower, but this serves as an excellent starting point.
- Toe Angle: Point your toes slightly outward, typically between 15 to 30 degrees. This external rotation helps facilitate hip mobility and allows for deeper squats by opening up space in the hip joint.
- Weight Distribution: Ensure your weight is distributed evenly across your entire foot, from heel to toe. Avoid letting your weight shift excessively to your toes or heels.
Experimentation within these parameters is key. What feels stable and allows for depth without discomfort is likely the correct stance for you.
Bracing and Core Engagement
Effective core bracing is paramount for spinal stability during the squat. It creates an internal “pressure” that protects your spine and transfers force efficiently throughout the movement. This isn’t just about “sucking in your stomach.”
The Valsalva maneuver, when performed correctly, can significantly enhance intra-abdominal pressure. Inhale deeply into your belly, imagining you’re filling your torso with air. Hold this breath, then brace your abdominal muscles as if preparing for a punch. Maintain this tension throughout the descent and ascent of the squat.
This creates a rigid torso, preventing unwanted spinal flexion or extension, which are common culprits for lower back pain during squats.
Descending with Control: The Hip Hinge
The squat often gets simplified to “bending your knees,” but the movement should initiate with a hip hinge. This means pushing your hips back first, as if you’re trying to sit on a chair placed far behind you.
This hip-first initiation ensures that the glutes and hamstrings are engaged early in the movement, contributing to a more powerful and balanced descent. Simultaneously, your knees will begin to bend and track outwards, aligning with your toes.
Do not allow your knees to collapse inward (valgus collapse); actively push them out throughout the entire range of motion, maintaining a stable and aligned lower body.
The depth of your squat will depend on your mobility, but aiming for at least parallel (crease of the hip below the top of the knee) is generally recommended for optimal muscle activation and strength gains. Descend slowly and with control, typically taking 2-3 seconds for the eccentric phase.
Understanding these foundational principles provides a robust framework. Consistency in applying them will pave the way for a more effective and safer squat, forming the bedrock of deeper, stronger lifts.
Addressing Common Squat Technique Flaws
Even with a solid understanding of the basics, various technical flaws can creep into your squat. Identifying and rectifying these common issues is a critical step in improving performance and preventing injury. Often, these flaws stem from mobility restrictions, strength imbalances, or simply bad habits developed over time.
A proactive approach to addressing these deficiencies will yield significant long-term benefits, allowing you to unlock your full squat potential.
Knees Caving In (Valgus Collapse)
Valgus collapse, where the knees “cave in” during the squat ascent or descent, is a prevalent and potentially injurious flaw. It places undue stress on the knee joint and can indicate weakness in the glute medius and adductor muscles, or limited hip mobility.
- Cues: Consciously “push your knees out” or “spread the floor with your feet.” Visualizing your knees tracking over your second and third toes can be helpful.
- Corrective Exercises: Banded squats (placing a resistance band just above or below the knees to provide external resistance for knee tracking), glute bridges, clam shells, and side-lying leg raises strengthen the abductors and external rotators of the hip.
- Mobility: Address hip internal rotation limitations if present. Foam rolling and dynamic stretches around the hips can improve range of motion.
Consistent reinforcement of external knee rotation is vital for long-term correction. Focus on quality over quantity initially.
Rounded Lower Back (Butt Wink)
The “butt wink” is a term used to describe the rounding of the lower back (lumbar spine flexion) at the bottom of the squat. This can compromise spinal integrity under load and often indicates limited ankle or hip mobility, or an inability to maintain core rigidity.
- Cues: Imagine maintaining a “proud chest” throughout the movement. Focus on keeping a neutral spine from start to finish. Think about controlling the hip hinge.
- Corrective Exercises: Ankle mobility drills (calf stretches, ankle dorsiflexion exercises against a wall), hip flexor stretches, and core stability exercises (planks, bird-dog) are crucial.
- Depth Adjustment: If mobility is severely limited, do not force depth beyond what your current range allows with a neutral spine. Work on your mobility concurrently.
Prioritize spinal neutrality at all costs, even if it means squatting to a shallower depth temporarily. Mobility work takes time but is an investment in your squat longevity.
Heels Lifting Off the Floor
If your heels consistently lift off the floor during the squat, it’s a clear sign of limited ankle dorsiflexion. This forces your body to compensate by rounding your back or shifting weight forward, both of which are undesirable.
- Corrective Exercises: Targeted ankle mobility drills are essential. Calf stretches, both with straight and bent knees, foam rolling your calves, and exercises that actively push your knees over your toes (like wall ankle mobilizations) can significantly improve dorsiflexion.
- Temporary Solutions: Elevating your heels slightly with weightlifting shoes or small weight plates can be a temporary workaround to allow for deeper squats while you work on mobility. However, this should not be a permanent substitute for addressing the underlying restriction.
Ignoring this flaw can lead to an unstable base and inefficient force transfer. Dedicate time to improving ankle mobility, and your squat depth and stability will naturally improve. Addressing these common issues systematically will lead to a more robust, powerful, and injury-resistant squat.
Mobility and Warm-up Drills for Enhanced Squat Performance
Effective squatting is as much about mobility and flexibility as it is about brute strength. Without adequate range of motion in the ankles, knees, and hips, proper technique becomes impossible, leading to compensations and potential injury. Therefore, dedicating time to specific mobility and warm-up drills is not merely beneficial but essential for optimizing your squat performance and longevity.
A well-structured warm-up prepares your body for the demands of the squat, increasing blood flow to the muscles, activating the nervous system, and improving joint lubrication. It’s an investment that pays dividends in every rep.
Dynamic Mobility Drills
Dynamic mobility exercises are preferable to static stretches before lifting, as they move your joints through their full range of motion, effectively preparing your muscles for activity rather than simply lengthening them. Static stretching is best reserved for post-workout.
- Leg Swings (Front-to-Back and Side-to-Side): These open up the hip flexors and adductors, improving hip mobility. Perform 10-15 swings per leg in each direction.
- Cossack Squats: An excellent drill for hip and ankle mobility, especially for those working on deeper squats. Slowly move from side to side in a wide stance, keeping one leg straight and the other bent.
- Cat-Cow Stretch: Improves spinal mobility and helps in finding a neutral spine position, crucial for core bracing. Start on all fours, arching and rounding your back with your breath.
These drills are not about pushing your limits but about gently gliding your joints through a comfortable, increasing range of motion.
Targeted Warm-up for Squat Muscles
Beyond general mobility, specific activation drills for the prime movers and stabilizers in the squat will further prepare your body.
Glute Activation: The glutes are key for hip extension and knee tracking. Incorporate movements like:
- Glute Bridges: Lie on your back, knees bent, feet flat. Drive through your heels to lift your hips off the ground, squeezing your glutes at the top. Perform 2-3 sets of 10-15 reps.
- Clam Shells: Lie on your side, knees bent, feet stacked. Keeping your feet together, open your top knee like a clam shell. This targets the glute medius. 2-3 sets of 10-15 reps per side.
Ankle Mobility Drills: Given the common limitation of ankle dorsiflexion, specific drills are paramount:
- Ankle Rocks/Half-Kneeling Ankle Mobility: In a half-kneeling position, gently lean forward, pushing your knee over your toes while keeping your heel down. Hold briefly, then return. Repeat for 10-15 reps per side.
- Wall Ankle Mobilization: Stand facing a wall, place your foot about 4-6 inches away. Lean your knee forward to touch the wall, keeping your heel down. Adjust foot distance to challenge your range.
These exercises should be performed with control and intention, focusing on feeling the correct muscles activate. They are not designed to fatigue you but to prime your body for the heavy lifting to come. A thorough warm-up, typically lasting 10-15 minutes, will significantly reduce injury risk and enhance your squat performance, ensuring each training session is optimally productive.

The Technique-Focused Squat Routine: Structure and Progression
A truly effective squat routine prioritizes technique over load, especially when aiming for long-term improvement and injury prevention. This doesn’t mean avoiding heavy weights indefinitely, but rather ensuring that every increase in load is supported by solid, ingrained movement patterns. This routine is designed to systematically build your squat, focusing on mastery of movement first, then gradually increasing intensity.
The progression here isn’t solely about adding weight; it’s also about increasing volume, reducing rest, or introducing more challenging variations as your technique solidifies. Consistency and patience are your best allies.
Weekly Training Schedule Example (3x/week)
This sample schedule integrates the squat into a broader strength training program. Adjust volume and frequency based on your recovery capabilities and overall training goals. Each session should begin with the mobility and warm-up drills mentioned previously.
- Day 1 (Heavy Squat Focus):
- Barbell Back Squat: 3-4 sets of 4-6 reps (focus on perfect form, challenging but not maxing out)
- Pause Squats: 2-3 sets of 3-5 reps (pause for 2-3 seconds at the bottom to improve stability)
- Hamstring Curls or Glute-Ham Raises: 3 sets of 8-12 reps
- Plank: 3 sets, hold for 30-60 seconds
- Day 2 (Light/Technique Focus):
- Barbell Back Squat (lighter weight, perfect form): 3 sets of 6-8 reps (focus on speed through the eccentric)
- Goblet Squats: 3 sets of 10-12 reps (emphasizes upright torso and depth)
- Lunges (alternating): 3 sets of 8-10 reps per leg
- Leg Raises: 3 sets of 10-15 reps
- Day 3 (Accessory/Weakness Focus):
- Front Squats or Box Squats: 3 sets of 5-8 reps (addressing specific weaknesses, e.g., upper back strength or depth control)
- Romanian Deadlifts (RDLs): 3 sets of 8-10 reps
- Calf Raises: 3 sets of 15-20 reps
- Bird-Dog: 3 sets of 10-12 reps per side
Ensure adequate rest between sets (2-3 minutes for heavy sets, 60-90 seconds for lighter sets). Volume can be adjusted based on recovery.
Progression Models for Long-Term Gains
Progression doesn’t always mean simply adding weight. Incorporating different forms of progressive overload ensures continuous improvement while maintaining a focus on technique.
Linear Progression (Beginner/Intermediate): Gradually increase the weight lifted while keeping reps constant. Once you hit the target reps for all sets, increase the weight slightly for the next session. This is effective until a plateau is reached.
Double Progression (Intermediate): When you can consistently hit the high end of your rep range (e.g., 6 reps for a 4-6 rep range), increase the weight for the next session, aiming for the lower end of the rep range. For example, if you hit 6 reps for all sets at 100kg, increase to 102.5kg and aim for 4-5 reps.
Wave Loading: Varying the intensity and volume within a week or cycle. This can involve a heavy day, a medium day, and a light day, allowing for recovery and skill practice at different loads.
Technique Drills as Progression: Introducing more technical variations (e.g., pause squats, tempo squats, pin squats) as your base technique improves challenges stability and control. This “progression of difficulty” helps refine movement patterns.
Always prioritize form over ego. If your technique breaks down, decrease the weight or stop the set. The goal is to build a robust, efficient squat, not just to lift heavy at any cost. Consistent application of these principles ensures sustainable progress and deeper, stronger squats over time. The journey is marathon, not a sprint.
Nutrition and Recovery: Fueling Your Improved Squat
While dedicated training and meticulous technique are the cornerstones of an improved squat, their effectiveness is severely limited without adequate attention to nutrition and recovery. Think of your body as a high-performance vehicle: you wouldn’t expect it to run optimally on low-grade fuel or without regular maintenance. Similarly, your muscles need the right nutrients to repair and grow stronger, and your central nervous system requires proper rest to recover from strenuous lifting sessions.
Neglecting these aspects can lead to stagnation, increased injury risk, and overall burnout, directly impeding your ability to progress in your squat and other lifts.
Optimizing Your Diet for Strength and Recovery
Your dietary intake directly impacts your energy levels, muscle repair, and overall adaptive capacity. A balanced diet is critical, but certain macronutrients play particularly vital roles in strength training.
- Protein: The building blocks of muscle. Aim for 1.6-2.2 grams of protein per kilogram of body weight spread throughout the day. Sources include lean meats, poultry, fish, eggs, dairy, legumes, and protein supplements.
- Carbohydrates: Your primary energy source. Complex carbohydrates (oats, brown rice, whole grains, starchy vegetables) provide sustained energy for workouts and replenish glycogen stores post-exercise. Timing your carbohydrate intake around workouts can enhance performance and recovery.
- Fats: Essential for hormone production, nutrient absorption, and overall health. Focus on healthy fats found in avocados, nuts, seeds, olive oil, and fatty fish.
Hydration is equally important. Dehydration can impair performance, reduce stamina, and hinder recovery. Drink plenty of water throughout the day, especially around your training sessions. Electrolytes may be beneficial during very long or intense workouts.
Furthermore, consider micronutrients. A diet rich in fruits and vegetables ensures you get essential vitamins, minerals, and antioxidants that support overall health, immune function, and recovery processes. These elements, although small in quantity, contribute significantly to the body’s ability to heal and adapt to stress.
The Importance of Sleep and Active Recovery
Strength gains are not made in the gym; they are made during recovery. Sleep is arguably the most potent recovery tool you have at your disposal.
Sleep: Aim for 7-9 hours of quality sleep per night. During deep sleep, your body releases growth hormone, critical for muscle repair and growth. Lack of sleep can impair cognitive function (affecting focus on technique), reduce circulating testosterone, and increase cortisol levels, all of which hinder progress and recovery.
Active Recovery: Light activities on your rest days can improve blood flow, reduce muscle soreness, and promote recovery without adding significant stress to your system. Examples include:
- Walking (20-30 minutes)
- Light cycling or swimming
- Foam rolling and light stretching
- Yoga or mobility flows
These activities help flush metabolic waste products from your muscles and improve overall tissue health, preparing you for upcoming training sessions. Active recovery should be low-intensity and should leave you feeling refreshed, not fatigued. Implementing these recovery strategies alongside your training regimen will ensure that your dedicated effort in the gym translates into tangible gains in squat strength and depth, setting the stage for consistent, long-term improvement.
Beyond the Barbell: Unweighted and Unconventional Squat Variations
While the barbell back squat is often considered the gold standard, neglecting unweighted and unconventional squat variations can be a missed opportunity for comprehensive development. These variations serve multiple purposes: they can be excellent tools for mastering technique without external load, identifying and correcting imbalances, enhancing stability, and even providing a refreshing challenge when barbell work feels stale. They build a resilient and adaptable squat that translates across different movements.
Incorporating these into your routine, either as warm-ups, accessory movements, or standalone workouts, diversifies the stimulus and strengthens various aspects of the squat pattern that might be overlooked with just barbell training.
Mastering the Air Squat
Before adding weight, mastering the air squat is non-negotiable. It provides the perfect environment to focus solely on movement patterns, body awareness, and the foundational principles. If you can’t perform a perfect air squat, adding load will only amplify your flaws.
- Focus Points: Ensure your hip hinge initiates first, knees track out, chest stays proud, and full depth is achieved with a neutral spine.
- Tempo Control: Experiment with different tempos (e.g., 3-second descent, 1-second pause, 1-second ascent) to build body awareness and control.
- Purpose: Use air squats as a daily mobility drill, a warm-up, or even as a high-rep finisher to build endurance and reinforce good mechanics under fatigue.
Many experienced lifters revisit air squats regularly to drill perfect form or to reset their movement patterns if technical issues arise. It’s a humble yet powerful tool.
Goblet Squats and Dumbbell Variations
Goblet squats, performed by holding a dumbbell or kettlebell against your chest, are arguably one of the best variations for teaching proper squat mechanics, especially for beginners. The anterior load helps counter-balance your torso, making it easier to stay upright and encouraging deeper squats.
Benefits of Goblet Squats:
- Improved upright posture.
- Enhanced core engagement.
- Easier to maintain knee tracking (pushing knees out).
- Excellent for teaching depth and torso verticality.
Dumbbell squats, where you hold dumbbells by your sides, are another beneficial alternative. They are less taxing on the core than goblet squats but still allow for focus on movement mechanics and offer a good substitute when a barbell isn’t available or desired.
They can serve as excellent accessory work to build strength in the full range of motion. Use them to supplement your barbell training or as a primary squat movement on lighter days.
Box Squats and Pause Squats
These variations are invaluable for addressing specific weaknesses and refining technique under controlled conditions.
Box Squats: Squatting down to a box (or bench) and pausing briefly before standing up. The box can be set at various heights to target specific parts of the squat range or to help with depth perception.
- Benefits: Teaches proper hip hinge, reinforces sitting back, improves glute activation, breaks the eccentric-concentric chain to build explosive strength from a dead stop.
- Application: Use at a height that challenges your weak point or at a height that ensures you hit good depth.
Pause Squats: Performing a regular barbell squat but holding a static pause at the bottom of the movement for a specified duration (e.g., 2-5 seconds) before ascending.
- Benefits: Dramatically improves stability, core bracing, strength out of the “hole” (bottom of the squat), and reinforces proper positioning under load. It eliminates any bounce, forcing pure strength and control.
- Application: Incorporate 2-3 sets of pause squats after your main squat sets, using a slightly lighter weight to maintain form during the pause.
By integrating these unweighted and unconventional squat variations, you build a more well-rounded and resilient squat. They provide avenues to address specific limitations, reinforce good habits, and challenge your body in diverse ways, ultimately leading to a more powerful and proficient squat, both with and without the barbell.
| Key Point | Brief Description |
|---|---|
| 👣 Footwork & Core | Proper stance and strong core bracing are vital for squat stability and spinal protection. |
| 🛠️ Flaw Correction | Address valgus collapse, butt wink, and heel lift with targeted drills and mobility work. |
| 🧘 Mobility & Warm-up | Dynamic drills and glute activation are crucial for range of motion and injury prevention. |
| 🍽️ Recovery & Fuel | Nutrition, sleep, and active recovery are as important as training for muscle growth and performance. |
Frequently Asked Questions About Squat Technique
▼
Mobility significantly impacts squat depth by determining the full range of motion your joints (ankles, hips, thoracic spine) can comfortably achieve. Limited mobility, especially in the ankles or hips, often restricts how low you can squat while maintaining proper form, leading to compensatory movements like a rounded lower back or heels lifting.
▼
Yes, for most individuals, it is not only okay but biomechanically necessary for the knees to travel past the toes, especially in deeper squats. The common fear about this often leads to a hip-dominant squat which can strain the lower back. What matters more is that your heels stay grounded and your knees track in line with your toes.
▼
Bracing is the process of creating intra-abdominal pressure to stabilize your spine during a heavy lift. It involves taking a deep breath into your belly, not your chest, and then tightening your abdominal muscles as if anticipating a punch. This creates a rigid torso, which protects your lower back and allows for more efficient force transfer throughout the movement.
▼
For most individuals aiming to improve their squat, training 2-3 times per week is highly effective. This frequency allows for sufficient stimulus for adaptation while providing adequate recovery time between sessions. Beginners might make faster progress with 3 times a week, while advanced lifters might benefit from varying intensity across their sessions.
▼
A weightlifting belt can be beneficial for providing external support and increasing intra-abdominal pressure during maximal or near-maximal lifts. However, it should not be relied upon as a substitute for proper bracing technique or a weak core. Beginners are generally advised to first develop strong natural core bracing before incorporating a belt into their training.
Conclusion
Mastering the squat is a journey, not a destination. It’s a continuous process of refinement, demanding patience, consistency, and an unwavering commitment to technique. By diligently focusing on foundational principles, actively addressing common flaws, prioritizing mobility, and complementing your training with optimal nutrition and recovery, you’re not just lifting heavier; you’re building a more resilient, functional, and powerful body. The technique-focused routine outlined here provides a robust framework for not only improving your squat’s strength and depth but also for enhancing your overall athletic prowess and promoting long-term joint health. Embrace the process, listen to your body, and celebrate each incremental improvement as you progress on your path to squat mastery.


